2020 官网升级中!现在您访问官网的浏览器设备分辨率宽度低于1280px请使用高分辨率宽度访问。

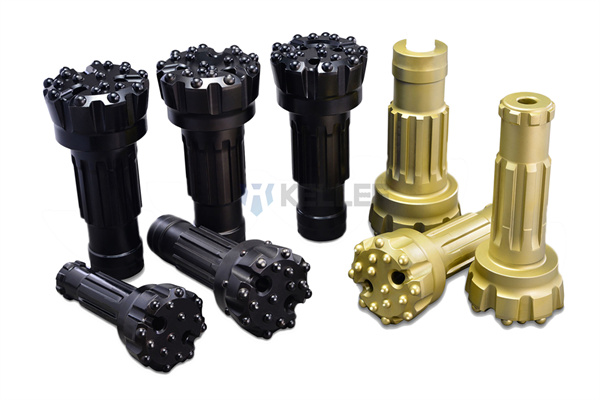
As one of the main types of rock drilling tools, the rock drill bit is mainly used to violently impact and break the rock during the rock drilling process, to achieve the purpose of drilling blast holes in the rock. Since the drill bit directly hits the rock, various failure states are inevitable. How to solve this problem, Today we mainly share with you 15 common methods to solve the failure of button bits.

1. The solution to the erosion of the bodies due to insufficient slag discharge capacity: Check to ensure that maximum available flushing is employed. If bailing appears to be inadequate, you can try cleaning holes thoroughly after drilling each steel length. Continuing drilling with poor bailing will wear bit bodies excessively.
2. The solution to the erosion of the bodies due to drilling and excessive hole cleaning in loose and fractured material: Don’t use new drill bits in these applications, till the drill bits approach the end of their usable life.Bits with missing buttons unsuitable for regular drilling can still be suitable for soft or broken ground conditions.
3. The solution to the split skirt caused by hammering on a bit to break the connection: Loosen the drill bit while seated firmly on the face or at bottom of the hole.
4. The solution to the steel crack between buttons caused by too big interference between buttons: You need to send it back to the factory for analysis.
5. The solution to the steel crack between buttons socket base due to interference between buttons is too big or no copper shim: You need to send it back to the factory for analysis.
6. The solution to the wring-off bodies caused by the high rotation torque applied to the stuck when it is stuck: you can apply a minimal amount of hammer pressure to the free bit before increasing the rotation pressure.
7. The solution to the lost gauge button caused by dry firing: Don’t engage full percussion unless the bits are seated firmly against solid material. Use reduced percussion when collaring on uneven surfaces if the bits hang up in the hole and when ratting the drill string to loosen connections.
8. The solution to the lost gauge button caused by excessive bit body reduction through erosion from poor flushing or excessive bit body grinding: Ensure the drill cuttings are adequately bailed. Avoid drilling in broken and fractured material where excessive hole cleaning or back drilling is required. Remove only the amount of body required to restore proper button protrusion while grinding.
9. The solution to shattered buttons caused by over drilling: 90% of all button failures are the direct result of continuing to drill with excessive wear flats on the buttons. Remove and service bits once the wear flat on any button reaches 1/3 of the face button diameter. Restore the button profile and protrusion as recommended in the bit sharpening guide before continuing use.
10. The solution to shattered buttons due to forceful rotation in undersize holes, in broken material, or through voids in the rock:
Check that bit diameters are smaller than the hole before attempting to clean or deepen a hole under these conditions. Do not force bits if jamming occurs. Retract until rotation freely then advance slowly with moderate rotation. If this fails, use a scrapped bit or grind down the gauge buttons of the bit to reduce the diameter sufficiently to pass or remove the obstruction.
11. The solution to sheared buttons above or below the bit body caused by forceful rotation against intrusions, in broken material, or through voids in the rock: Jerky rotation and stalling indicate obstructions in the hole. Do not force bits if this occurs. Retract the string until the free rotation is restored. Then advance slowly with moderate rotations until the obstacle is passed or removed. If this fails, you can use scrap bits, a smaller diameter bit, or grind down the gauge buttons of the bit to reduce the diameter sufficiently to pass or remove the obstruction.
12. The solution to sheared buttons above or below the bit body caused by the excessive button protrusion through incorrect sharpening: Protrusions greater than 3/4 of the button diameter will not provide sufficient support to resist the tensile forces that the buttons may encounter.
13. The solution to split buttons due to over drilling: 90% of all button failures are the direct result of continuing to drill with excessive wear flats on the buttons. Remove and service bits on that the wear flat on any button reaches 1/3 of the face button diameter. Restore the button profile and protrusion as recommended in the bit sharpening guide before continuing use.
14. The button solution wears 1/3 diameter due to normal button wear: you need to resharpen the button and restore it to its original profile.
15. When drilling into non-abrasive rock, micro-fractures develop in carbide. The solution to snakeskin, shiny polished appearance is to resharpen bits frequently even if no visible wear is evident.
Although there are various factors for the failure of the drill bit, most of them are normal phenomena. You can solve the problem of partial failure of the drill bit through my sharing, and use these methods to help prolong the service life of the drill bit and bring more economic benefits to the enterprise.