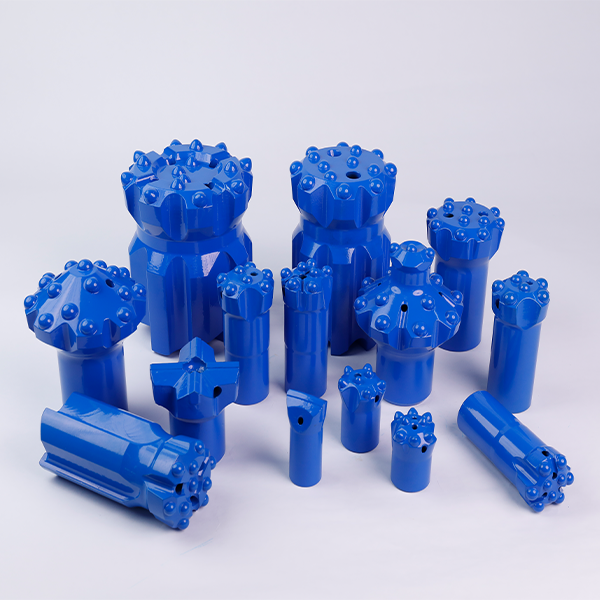
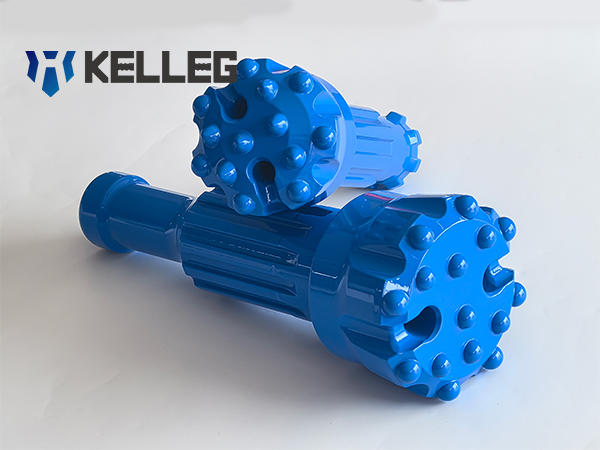
Introduction
In drilling operations, DTH drill bit failures are one of the most overlooked factors driving up project costs. A single failed bit can lead to unplanned downtime, reduced penetration rates, and significantly higher cost per meter—especially in demanding rock conditions.
Common issues such as carbide button loss (pop-out), button breakage, uneven wear, and bit body cracking not only affect drilling efficiency but also shorten tool lifespan. These problems are often symptoms of deeper issues related to bit selection, operating parameters, or rock conditions.
The good news is that most of these DTH drill bit problems are preventable. By conducting proper failure analysis and applying the right troubleshooting strategies, operators can dramatically extend bit life, improve drilling performance, and reduce overall operational costs.
This guide will walk you through the most common failure types, their root causes, and practical solutions to help you optimize your drilling results.
Why Do DTH Drill Bits Fail?
Understanding why DTH drill bits fail is the first step toward improving drilling efficiency and reducing operational costs. Most failures are not random—they are the result of identifiable and preventable factors related to geology, equipment setup, and maintenance practices.
Below are the most common root causes behind DTH drill bit problems, along with how they impact performance:
Harsh Drilling Conditions
Drilling in hard, abrasive, or highly fractured rock formations places extreme stress on both the carbide buttons and the bit body.
- Hard rock → high impact stress → button breakage
- Abrasive rock → accelerated wear → reduced bit service life
- Fractured formations → uneven load → button loss or cracking
Improper Bit Selection
Choosing the wrong face design or button shape for the rock condition is a leading cause of premature failure.
- Incorrect face design → poor hole cleaning or instability
- Wrong button type → increased risk of breakage or low penetration rate
Incorrect Operating Parameters
Improper drilling settings can quickly damage even high-quality bits.
- Excessive Weight on Bit (WOB) → button cracking or breakage
- Incorrect rotation speed (RPM) → uneven wear
- Insufficient or excessive air pressure → overheating or poor flushing
Poor Maintenance Practices
Lack of regular inspection and maintenance accelerates wear and failure.
- No button grinding → flat wear → reduced drilling efficiency
- Ignoring early damage → leads to severe failures
Low-Quality Carbide or Manufacturing Defects
The quality of materials and production processes plays a critical role.
- Poor carbide bonding → button pop-out
- Inconsistent heat treatment → body cracking
- Weak steel structure → reduced durability
Quick Summary of Root Causes
| Category | Typical Issue | Impact on Drilling |
|---|---|---|
| Rock Conditions | Hard, abrasive, fractured formations | Accelerated wear, breakage, instability |
| Bit Selection | Mismatched face design or button shape | Low efficiency, premature failure |
| Operating Parameters | Incorrect WOB, RPM, and air pressure | Overloading, overheating, uneven wear |
| Maintenance | Lack of inspection or grinding | Shortened bit life, reduced performance |
| Material & Manufacturing | Low-quality carbide or steel defects | Button loss, cracking, and structural failure |
By identifying which of these factors is affecting your operation, you can apply targeted troubleshooting strategies to reduce failures, extend bit life, and significantly lower your drilling cost per meter.
Carbide Button Pop-Out (Button Loss): Causes & Solutions
Carbide button pop-out is one of the most common and costly DTH drill bit failures. When carbide inserts detach from the bit body, drilling efficiency drops sharply, leading to increased downtime and higher cost per meter. Understanding the root causes and applying the right troubleshooting methods can effectively prevent this issue.
Common Causes of Carbide Button Pop-Out
- Excessive Bit Body Wash. Prolonged exposure to abrasive conditions can erode the bit body, reducing the holding strength of carbide buttons.
- Over-Grinding of the Bit Body. Improper sharpening practices may remove too much material, weakening the interference fit between the button and the steel body.
- Drilling in Soft or Highly Abrasive Formations. Soft rock → insufficient support for buttons; Abrasive rock → accelerated wear around button seats
- Unconsolidated or Loose Rock Conditions. Irregular impact forces in unstable formations can loosen carbide inserts over time.
- Excessive Impact Energy from the Hammer. High piston energy can overstress the button seating area, especially if not matched to rock conditions.
- Insufficient Feed Pressure. Poor contact between the bit and rock leads to unstable impact, increasing the risk of button loosening.
- Back Hammering / Dry Firing. Operating the hammer without proper rock contact causes abnormal stress, significantly increasing the chance of button pop-out.
Recommended Solutions & Preventive Actions
- Apply Proper Carbide Sharpening Practices. Avoid excessive grinding of the bit body. Always follow correct procedures and replace severely worn bits in time.
- Optimize Drilling Parameters. Adjust air pressure, impact energy, and rotation speed according to the specific rock conditions.
- Set Appropriate Feed Pressure. Ensure consistent and sufficient contact between the bit and the rock to maintain stable drilling.
- Avoid Dry Firing and Back Hammering. Always ensure the bit is fully engaged with the rock before activating percussion.
Key Takeaway
Most carbide button pop-out issues are preventable. By combining proper maintenance, correct parameter settings, and suitable operating practices, you can significantly extend DTH drill bit life and improve overall drilling performance.
Carbide Breakage (Socket Failure & Shearing): Causes & Solutions
Carbide breakage—such as carbide cracking inside the socket or the top of the carbide shearing off at the bit body—is a critical DTH drill bit failure that can severely impact drilling performance. This type of damage often results in reduced penetration rates, unstable drilling, and premature bit replacement if not addressed promptly.
Common Causes of Carbide Breakage
- Overheating of the Drill Bit. Insufficient flushing or excessive energy input can cause high temperatures, weakening the carbide structure and leading to internal cracking or surface breakage.
- Drilling with Flat or Worn Carbides. Dull (flat) buttons increase contact area and stress, making them more prone to cracking or shearing under impact.
- Forceful Rotation Against Rock Obstructions. Applying excessive rotational force when encountering hard inclusions or obstacles can cause sudden stress concentration, resulting in carbide breakage.
Recommended Solutions & Preventive Actions
- Optimize Drilling Parameters. Adjust rotation speed (RPM), impact energy, and air pressure to match the rock conditions, avoiding excessive stress on the carbides.
- Maintain Sharp Carbides. Regularly inspect and sharpen dull buttons using proper carbide grinding procedures to ensure efficient rock penetration and reduce stress buildup.
- Control Feed Pressure. Set appropriate feed force to maintain stable drilling. Avoid both underfeeding and overloading, especially in variable formations.
- Use Damaged Bits in Challenging Conditions. In difficult drilling environments—such as loose, fractured rock or when encountering obstructions—it is advisable to use already worn or partially damaged bits to protect new or high-quality bits from premature failure.
Key Takeaway
Carbide breakage is often the result of heat, wear, and improper drilling practices. By maintaining sharp buttons, optimizing drilling parameters, and adapting to changing ground conditions, operators can significantly reduce failure rates and extend DTH drill bit service life.
Bit Body Cracking Near Carbide: Causes & Solutions
Cracks in the bit body—especially near the carbide buttons, originating from the bottom of the carbide socket, or cases where the carbide remains intact but the surrounding steel matrix is missing—are serious DTH drill bit problems that indicate structural failure. These issues can lead to sudden bit failure, safety risks, and increased downtime if not properly addressed.
Typical Failure Symptoms
- Cracks forming around carbide button areas
- Fractures starting from the bottom of the carbide socket
- Carbide inserts remain intact while the surrounding steel erodes or breaks away
Root Cause
Excessive Interference Between Carbide and Bit Body
An overly tight fit between the carbide button and the steel body can create high internal stress during operation. Under repeated impact and thermal cycles, this stress may lead to cracking in the surrounding material.
Recommended Action
Return the Bit to the Manufacturer for Failure Analysis
This type of failure is typically related to design, material selection, or manufacturing processes (such as incorrect interference fit or heat treatment).
A detailed professional analysis will help:
- Identify the exact root cause
- Prevent recurrence in future batches
- Ensure product quality and reliability
Key Takeaway
Unlike common wear-related issues, cracks near carbide sockets are often manufacturing-related failures rather than operational errors. Prompt analysis by the supplier or manufacturer is essential to avoid repeated failures and ensure optimal drilling performance.
Carbide Crushing (Surface Flattening & Internal Crushing): Causes & Solutions
Carbide crushing—where the top of the carbide is compressed down to the level of the bit body or the carbide is crushed inside the socket—is a common yet often misunderstood DTH drill bit failure. This issue typically occurs in specific rock conditions and is closely linked to improper maintenance practices.
Typical Failure Symptoms
- Carbide buttons flattened to the same level as the bit face
- Internal crushing or deformation of carbide inside the socket
- Reduced penetration rate despite stable drilling parameters
Common Causes of Carbide Crushing
- Over-Drilling in Non-Abrasive Rock (e.g., Limestone). In softer, non-abrasive formations, carbides do not wear naturally. Continued drilling without maintenance causes stress to build up, leading to crushing instead of gradual wear.
- Improper Carbide Grinding Intervals. Delayed sharpening allows buttons to become excessively dull, increasing impact stress and risk of crushing.
- Excessive Carbide Protrusion. Poor grinding practices can leave carbide buttons extending too far from the bit body, making them more vulnerable to impact damage.
Recommended Solutions & Preventive Actions
- Inspect Carbides Frequently. Look for early signs such as the “snake skin” wear pattern, which indicates surface fatigue and the need for immediate maintenance.
- Shorten Grinding Intervals in Soft Rock. In non-abrasive conditions like limestone, increase the frequency of carbide sharpening to prevent stress buildup.
- Sharpen Carbides at the Right Time. Regrind buttons as soon as they become dull or when micro-cracks begin to appear. Always follow proper carbide sharpening procedures.
- Avoid Excessive Grinding of the Bit Body. Maintain structural integrity by removing only the necessary material during sharpening.
- Control Carbide Protrusion. Ensure that carbide buttons do not extend beyond approximately 3/4 of their diameter to reduce the risk of impact damage.
Key Takeaway
Carbide crushing is largely preventable with proper maintenance and correct grinding practices, especially in non-abrasive rock conditions. Regular inspection and timely sharpening are essential to maintaining optimal DTH drilling performance
Carbide Loss with Matrix Damage: Causes & Solutions
Carbide loss accompanied by damage to the surrounding steel matrix—whether the carbide is partially missing or completely lost—is a severe DTH drill bit failure. This condition not only reduces drilling efficiency but can also accelerate wear on the entire bit, leading to premature replacement and higher operating costs.
Typical Failure Symptoms
- Carbide buttons are partially broken or completely missing
- Visible damage, erosion, or deformation of the surrounding bit body (matrix)
- Reduced penetration rate and unstable drilling performance
Common Causes of Carbide Loss & Matrix Damage
- Over-Drilling of the Bit. Continuing to use a worn bit beyond its service life increases stress on both carbide and the surrounding steel, leading to structural failure.
- Drilling with Flat (Worn) Carbides. Dull buttons create higher impact stress and reduce cutting efficiency, accelerating both carbide loss and matrix damage.
- Improper Grinding Intervals. Delayed or inconsistent sharpening allows excessive wear to develop, weakening the support structure around the carbide.
- Using a Bit Already Missing Carbide. Operating a damaged bit creates uneven load distribution, causing rapid deterioration of remaining carbides and surrounding material.
Recommended Solutions & Preventive Actions
- Increase Inspection Frequency. Regularly check carbide condition to identify early signs of wear or damage before failure escalates.
- Maintain Proper Sharpening Practices. Sharpen dull carbides promptly using correct procedures to maintain optimal shape and performance.
- Optimize Grinding Intervals. Adjust sharpening frequency based on rock conditions to prevent excessive wear.
- Discard Severely Worn or Damaged Bits. Do not continue using bits with missing carbides. Replace them in time to avoid further damage and inefficiency.
Key Takeaway
Carbide loss with matrix damage is typically the result of overuse and insufficient maintenance. By implementing regular inspections, proper sharpening intervals, and timely replacement, operators can significantly reduce DTH drill bit problems and maintain consistent drilling performance.
Carbide Chipping & Cracking: Causes & Solutions
Carbide chipping and cracking are common DTH drill bit problems that can quickly reduce drilling efficiency and lead to premature bit failure if not addressed early. These failures often start as small defects but can rapidly propagate under repeated impact, making early detection and proper maintenance critical.
Typical Failure Symptoms
- Small chips or fragments are missing from carbide buttons
- Visible cracks on the carbide surface
- Gradual decline in penetration rate and drilling stability
Common Causes of Carbide Chipping & Cracking
- Over-Drilling of the Bit. Using the bit beyond its optimal service life increases stress on already weakened carbides, making them prone to cracking.
- Drilling in Non-Abrasive Rock. In softer formations, carbides do not wear naturally, leading to stress accumulation and eventual chipping or cracking.
- Improper Grinding Intervals. Delayed sharpening allows micro-cracks to develop and expand under continuous impact.
- Incorrect Carbide Grade Selection Using carbide that is too hard for the rock condition reduces toughness, increasing the likelihood of brittle fracture.
- Slow Rotation or Poor Bit Positioning. When the bit is not properly engaged with solid rock or rotates too slowly, uneven impact forces can cause localized stress and cracking.
Recommended Solutions & Preventive Actions
- Inspect Carbides Frequently. Look for early warning signs such as the “snake skin” wear pattern, which indicates surface fatigue and potential cracking.
- Sharpen Carbides at the Right Time. Regrind buttons as soon as they become dull or when micro-cracks begin to appear. Always follow proper carbide sharpening procedures.
- Select the Right Carbide Grade. Choose carbide with suitable hardness and toughness based on the specific drilling conditions.
- Ensure Proper Bit Engagement. Do not start percussion until the bit is in full contact with solid rock to avoid abnormal impact stress.
Key Takeaway
Carbide chipping and cracking are largely preventable through correct bit selection, timely maintenance, and proper drilling practices. By addressing issues early, operators can extend DTH drill bit life, maintain stable performance, and reduce overall drilling costs.
Face Cracking: Causes & Solutions
Face cracking is a critical DTH drill bit failure that can compromise drilling efficiency and bit lifespan. It typically occurs when excessive stress is applied to the bit face, leading to cracks around the carbide buttons or bit body.
Typical Failure Symptom
- Visible cracks on the bit face, often near carbide buttons
- Reduced penetration rate and uneven drilling
Common Cause
- Excessive Feed Force. Applying too much downward force can overstress the bit face, especially in deep-hole drilling, causing cracks to form in the bit matrix or around the carbide buttons.
Recommended Solutions & Preventive Actions
- Reduce Feed Force. Adjust the applied feed pressure to ensure the carbides engage the rock without overloading the bit face.
- Use “Pull Back” in Deep Holes. In deep-hole drilling, the weight of the drill string can push excessively on the bit. Periodically, “pull back” the drill string to relieve pressure and prevent face cracking.
Key Takeaway
Face cracking is often a result of mechanical overload rather than material defects. By carefully controlling feed force and managing drill string weight in deep holes, operators can prevent cracks and extend DTH drill bit life.
Bit Body Wash (Excessive Steel Wear): Causes & Solutions
Bit body wash occurs when the steel of the bit body or bit face wears excessively, reducing structural integrity and drilling efficiency. This problem is common in highly abrasive rock formations and can lead to shortened bit life if not properly managed.
Typical Failure Symptoms
- Noticeable thinning or erosion of the bit body or face
- Reduced penetration rate despite normal operating parameters
- Premature carbide exposure or loss due to matrix wear
Common Cause
- Drilling in Extremely Abrasive Conditions. Hard, sandy, or highly abrasive rock creates continuous friction and impact on the steel body, accelerating wear.
Recommended Solutions & Preventive Actions
- Slow Down Rotation. Reduce rotation speed where possible. Slower rotation helps create larger rock cuttings that are easier to flush out of the hole.
- Maximize Flushing Efficiency. Ensure adequate air pressure or fluid flow to remove cuttings efficiently.
- Use Drilling Foam. Drilling foam can help lift abrasive cuttings and reduce wear on the bit body.
- Clean Drill Holes Regularly. Prevent accumulation of abrasive debris that can cause additional steel erosion.
- Adjust Hammer Choke. Reduce the up-hole velocity of rock cuttings to minimize erosion and wear on the bit body.
Key Takeaway
Bit body wash is primarily caused by abrasive rock conditions. By optimizing flushing, controlling rotation speed, and using drilling aids like foam, operators can significantly reduce steel wear and extend the service life of their DTH drill bits.
Carbide Snake Skin Wear Pattern: Causes & Solutions
The “snake skin” wear pattern on carbide buttons is a common DTH drill bit issue, especially in soft, non-abrasive rocks like limestone. While it may seem minor at first, if ignored, it can lead to reduced penetration rates and accelerated carbide damage.
Typical Failure Symptoms
- Fine, elongated wear marks resembling snake skin on carbide surfaces
- Gradual reduction in cutting efficiency
- Early signs of micro-cracks or dulling of the carbide
Common Causes
- Drilling in Non-Abrasive Rock (e.g., Limestone). Soft formations cause uneven stress distribution on carbides, creating surface fatigue instead of uniform wear.
- Improper Carbide Grinding Intervals. Delayed or inconsistent sharpening allows micro-cracks to develop, which exacerbate the snake skin wear pattern.
Recommended Solutions & Preventive Actions
- Inspect Carbides Frequently. Regularly check for early signs of the snake skin wear pattern to prevent deeper damage.
- Shorten Grinding Intervals in Soft Rock. Increase the frequency of carbide sharpening when drilling in non-abrasive formations to prevent stress buildup.
- Sharpen Carbides Promptly Regrind buttons as soon as dulling or micro-cracks appear, following proper carbide sharpening procedures to maintain optimal cutting efficiency.
Key Takeaway
The snake skin wear pattern is largely preventable through timely inspection and maintenance. By maintaining proper grinding intervals and closely monitoring carbide condition, operators can ensure consistent drilling performance and extend the service life of DTH drill bits.
Shank Break at Retaining Ring Bearing Surface: Causes & Solutions
A shank break across the retaining ring bearing surface is a serious DTH drill bit failure that can cause sudden operational stoppages and costly downtime. This type of failure usually results from mechanical stress combined with inadequate maintenance.
Typical Failure Symptoms
- Shank fracture near the retaining ring area
- Reduced stability during drilling
- Sudden loss of drilling efficiency
Common Causes
- Lack of Lubrication. Insufficient hammer oil increases friction and heat, stressing the shank and retaining ring area.
- Worn-Out Bit Retaining Rings. Damaged or worn rings fail to support the bit properly, concentrating stress on the shank.
- Worn-Out Guide Bushing. Excessive lateral movement due to bushing wear leads to uneven forces on the shank.
Recommended Solutions & Preventive Actions
- Use Proper Hammer Oil. Apply the correct type and quantity of lubrication to reduce friction and wear.
- Inspect Bit and Hammer Components Before Drilling. Check the condition of the bit, retaining rings, and guide bushing to identify wear or damage early.
- Replace Worn Components. Replace any worn retaining rings, guide bushings, or other hammer components to maintain proper alignment and support.
Key Takeaway
Shank breakage at the retaining ring bearing surface is usually preventable with proper lubrication and regular maintenance. By inspecting components and replacing worn parts promptly, operators can avoid catastrophic bit failure and maintain stable drilling performance.
Shank Break Across the Drive Splines: Causes & Solutions
A shank break across the drive splines is a critical DTH drill bit failure that can lead to sudden drilling stoppages and increased operational costs. This failure is usually caused by mechanical overload, improper bit-to-hammer matching, or worn components.
Typical Failure Symptoms
- Fracture across the drive splines of the shank
- Difficulty transmitting torque from hammer to bit
- Sudden loss of drilling efficiency
Common Causes
- Oversized Bit Head Diameter. Using a drill bit with a head diameter larger than recommended for the DTH hammer increases stress on the drive splines.
- Excessive Torque. Applying too much rotational force can overload the splines, causing them to shear or break.
- Worn Out Driver Sub. A degraded driver sub causes uneven load distribution, increasing stress on the bit shank.
Recommended Solutions & Preventive Actions
- Adjust Drill Settings for Oversized Bits. Modify rotation speed, WOB, and air pressure to reduce stress on the drive splines.
- Use the Correctly Sized Hammer. Select a larger DTH hammer that matches the diameter of the drill bit for safe and efficient operation.
- Adjust Torque to Rock Conditions. Optimize torque based on rock hardness to avoid overloading the splines.
- Inspect Bit and Hammer Components Before Drilling. Check the condition of the bit shank and driver sub for wear or damage.
- Replace Worn Components Promptly. Ensure that worn or damaged hammer parts are replaced with new, high-quality components to maintain proper load distribution.
Key Takeaway
Shank breaks across drive splines are preventable through proper bit-to-hammer matching, torque control, and maintenance. Regular inspection and using correctly sized equipment will help extend DTH drill bit life and ensure consistent drilling performance.

Broken Piston Striking the Bit Face: Causes & Solutions
A broken piston striking the bit face is a serious DTH drill hammer failure that can cause immediate damage to the drill bit and reduce drilling efficiency. This type of failure is typically linked to worn hammer components or poor maintenance.
Typical Failure Symptoms
- Piston fragments or damage observed on the bit face
- Sudden reduction in penetration rate
- Possible secondary damage to carbide buttons or bit body
Common Causes
Worn Out Piston, Bit Retaining Ring, or Driver Sub
Degraded hammer components can allow misalignment or excessive movement, leading to the piston striking the bit improperly.
Worn Out Guide Bushing
Excessive lateral movement caused by a worn bushing increases the risk of piston misalignment and impact on the bit face.
Recommended Solutions & Preventive Actions
Inspect Hammer Components Before Drilling
Check the piston, bit retaining rings, driver sub, and guide bushing for wear or damage to ensure proper alignment and operation.
Replace Worn Components Promptly
Swap out any degraded parts with new, high-quality hammer components to maintain consistent performance and prevent piston strikes.
Key Takeaway
Piston strikes on the bit face are usually preventable with proper maintenance and timely replacement of worn components. Regular inspection ensures safe, efficient drilling and protects the DTH drill bit from unnecessary damage.
Shoulder Damage: Causes & Solutions
Shoulder damage occurs when the bit’s shoulder area near the carbide buttons becomes worn or cracked, affecting drilling efficiency and bit life. This type of failure is typically caused by improper feed force during operation.
Typical Failure Symptoms
- Visible wear, deformation, or cracking at the bit shoulder
- Reduced penetration rate and uneven drilling
- Premature carbide wear or loss
Common Cause
Incorrect Feed Force
Applying too much or too little feed pressure can overstress the bit shoulder. Excessive force may crush the shoulder, while insufficient force prevents proper carbide engagement, leading to uneven impact stress.
Recommended Solutions & Preventive Actions
Adjust Feed Force Appropriately
- Ensure carbides remain fully engaged with the rock.
- Apply more feed force when drilling soft rock for proper penetration.
- Reduce feed force as drill pipe is added, since the weight of the drill string naturally increases pressure on the bit.
Key Takeaway
Shoulder damage is largely preventable by monitoring and adjusting feed force according to rock conditions and drill string weight. Proper feed control ensures optimal DTH drill bit performance and extends bit life.
Piston Striking Face Damage: Causes & Solutions
Piston striking face damage occurs when the piston impacts the drill bit face improperly, leading to reduced drilling efficiency and potential carbide or bit body damage. This failure is often related to lubrication issues or contamination.
Typical Failure Symptoms
- Visible dents, cracks, or wear marks on the bit face
- Reduced penetration rate
- Accelerated carbide wear or matrix damage
Common Causes
- Insufficient Lubrication. Low or improper hammer oil increases friction and heat, causing the piston to strike the bit face unevenly.
- Foreign Material Trapped Between Bit and Piston. Dirt, rock fragments, or debris can disrupt normal piston movement, leading to impact damage on the bit face.
Recommended Solutions & Preventive Actions
- Use Proper Hammer Oil. Apply the manufacturer’s recommended type and quantity of lubrication to ensure smooth piston operation.
- Maintain Clean and Tight Hammer Joints. Regularly clean the driver sub, bit retaining ring, and drive splines to prevent debris interference.
- Inspect Hammer Check Valve Assembly. Ensure the check valve is functioning correctly to maintain proper air flow and prevent piston misalignment.
Key Takeaway
Piston striking face damage is largely preventable with adequate lubrication, cleanliness, and regular inspection. Following these practices helps maintain consistent DTH drilling performance and prolongs bit life.
Bit Retaining Area Damage: Causes & Solutions
Bit retaining area damage occurs when the region of the bit that holds the carbide buttons or connects to the hammer becomes worn, cracked, or deformed. This can reduce drilling efficiency and shorten bit life if not addressed promptly.
Typical Failure Symptoms
- Visible wear, cracks, or deformation around the bit retaining area
- Loose fit between the bit and hammer
- Reduced penetration rate and unstable drilling
Common Causes
Loose Driver Sub
Insufficient torque on the driver sub can cause the bit to move or vibrate excessively, stressing the retaining area.
Insufficient Feed Force
If the bit is “out running” the hammer, meaning it moves ahead of proper percussion impact, it can overload the retaining area, especially in soft or unconsolidated rock.
Recommended Solutions & Preventive Actions
Apply Proper Torque on Driver Sub
Ensure the driver sub is tightened to manufacturer specifications to prevent movement and stress on the retaining area.
Increase Feed Force When Necessary
Apply additional feed force when drilling in soft or unconsolidated rock to keep the bit properly engaged and prevent excessive movement.
Key Takeaway
Bit retaining area damage is largely preventable through proper hammer assembly and feed control. Maintaining the correct torque and adjusting feed force according to rock conditions ensures stable DTH drilling performance and extends bit life.
Broken Blow Tube / Foot Valve: Causes & Solutions
A broken blow tube or foot valve is a significant DTH hammer failure that can lead to reduced air flow, unstable percussion, and damage to the drill bit. This failure typically results from worn hammer components, misalignment, or inadequate lubrication.
Typical Failure Symptoms
- Air leakage or loss of hammer efficiency
- Reduced penetration rate and unstable drilling
- Visible damage to the blow tube or foot valve
Common Causes
Worn Piston, Drive Splines, or Driver Sub
Degraded components can create uneven impact forces and misalignment, stressing the blow tube or foot valve.
Misalignment
Incorrect hammer assembly or drilling technique can cause the blow tube or foot valve to strike unevenly, leading to breakage.
Lack of Lubrication
Insufficient hammer oil increases friction and heat, accelerating wear on moving parts and causing component failure.
Recommended Solutions & Preventive Actions
Inspect Hammer Components Before Drilling
Check the piston, bit, driver sub, and blow tube for wear or damage before operation.
Replace Worn Components
Swap out degraded or damaged hammer parts with new, high-quality components to ensure proper function.
Ensure Proper Alignment
Use alignment tools and adjust drilling practices to maintain a straighter hole. Consider using bits with a concave face design to reduce stress on the blow tube.
Apply Correct Lubrication
Use the manufacturer’s recommended type and quantity of hammer oil to reduce friction and protect moving parts.
Key Takeaway
Blow tube and foot valve failures are largely preventable through regular inspection, proper alignment, and adequate lubrication. Following these best practices helps maintain consistent DTH hammer performance and prolongs drill bit life.
Quick DTH Drill Bit Troubleshooting Table
To help operators quickly identify and address common DTH drill bit failures, the table below summarizes symptoms, typical causes, and recommended solutions.
| Failure / Symptom | Typical Cause | Recommended Solution / Action |
|---|---|---|
| Carbide button pop-out | Excessive body wash; Over-grinding; Drilling in soft or extremely abrasive rock; Insufficient feed pressure; Back hammering / dry firing | Follow proper carbide sharpening; Replace worn bits; Adjust drilling parameters and feed pressure; Avoid dry firing |
| Carbide broken inside socket/top sheared | Overheating; Drilling with flat carbides; Forceful rotation against obstacles | Adjust RPM and drilling parameters; Sharpen dull carbides; Adjust feed pressure; Use damaged bits in difficult formations |
| Cracks near carbide / surrounding matrix are missing | Excessive interference between bit and carbide | Return bit to manufacturer for analysis |
| Carbide crushed/flattened | Over-drilling in non-abrasive rock; Improper grinding; Excessive carbide protrusion | Inspect carbides for snake skin wear; Shorten grinding intervals; Sharpen carbides correctly; Control carbide protrusion (< ¾ diameter) |
| Carbide partially/completely missing, matrix damaged | Over-drilling; Flat carbides; Improper grinding; Using damaged bit | Inspect carbides frequently; Sharpen carbides; Adjust grinding intervals; Replace worn bits |
| Carbide chipped/cracked | Over-drilling; Non-abrasive rock; Improper grinding; Carbide grade too hard; Slow rotation / poor bit contact | Inspect carbides; Sharpen when dull or microcracks form; Select suitable carbide grade; Ensure full rock contact |
| Face cracking | Excessive feed force | Reduce feed force; “Pull back” in deep holes to compensate for drill string weight |
| Bit body wash | Drilling in extremely abrasive conditions | Slow rotation; Maximize flushing; Use drilling foam; Clean holes regularly; Adjust hammer choke |
| Carbide snake skin wear | Non-abrasive rock; Improper grinding intervals | Inspect frequently; Shorten grinding intervals; Sharpen carbides properly |
| Shank break (retaining ring) | Lack of lubrication; Worn retaining rings or guide bushing | Use proper hammer oil; Inspect and replace worn components |
| Shank break (drive splines) | Oversized bit; Excessive torque; Worn driver sub | Use correctly sized hammer; Adjust torque; Inspect and replace worn components |
| Piston striking bit face | Worn piston, driver sub, retaining rings; Worn guide bushing | Inspect and replace worn parts; Maintain proper alignment |
| Shoulder damage | Incorrect feed force | Adjust feed force to maintain carbide engagement; Reduce as drill string weight increases |
| Bit retaining area damage | Loose driver sub; Insufficient feed force | Apply correct torque; Increase feed in soft/unconsolidated rock |
| Broken blow tube/foot valve | Worn piston, driver sub, misalignment, lack of lubrication | Inspect and replace worn parts; Use alignment tools; Apply proper hammer oil |
How to Prevent DTH Drill Bit Failures
Preventing DTH drill bit failures is the most effective way to improve drilling efficiency, reduce operating costs, and extend bit life. Following best practices across bit selection, operation, and maintenance can significantly reduce the risk of common failures.
Choose the Right Bit Design
- Match face design (Flat, Concave, Convex, Drop Center) with button shape (Hemispherical, Ballistic, Parabolic) based on rock conditions.
- Correct combinations reduce stress on carbides and improve penetration rate.
Optimize Drilling Parameters
- Apply the proper Weight on Bit (WOB) for the rock formation.
- Use the correct rotation speed (RPM) to prevent excessive wear or breakage.
- Maintain adequate air pressure to ensure efficient flushing and prevent overheating.
Ensure Proper Flushing
- Remove rock cuttings efficiently to prevent bit clogging and matrix erosion.
- Maintain airflow or use drilling foam where necessary.
- Proper flushing prevents overheating, reduces carbide wear, and avoids body wash.
Regular Inspection & Maintenance
- Check carbide button wear patterns frequently.
- Regrind carbides before excessive wear or micro-cracks develop.
- Inspect bit body, shank, and retaining areas to catch early signs of damage.
Use High-Quality Drill Bits
- Source bits from reliable manufacturers with proven quality standards.
- Ensure consistent heat treatment and carbide quality to reduce the risk of brittle fracture or premature failure.
- High-quality bits provide longer service life and more predictable performance.
Key Takeaway
Preventive practices—proper bit selection, optimized drilling, regular maintenance, and high-quality materials—are the most effective ways to minimize DTH drill bit failures and maintain efficient, cost-effective drilling operations.
When Should You Replace a DTH Drill Bit?
Knowing when to replace a DTH drill bit is critical to maintaining efficient drilling and preventing damage to equipment. Replacing the bit at the right time reduces downtime, lowers overall costs, and prevents secondary failures.
Key Replacement Indicators
- Button height reduced by ~1/3. Significant wear decreases penetration efficiency and increases the risk of breakage.
- Multiple button failures. Frequent carbide loss or chipping indicates the bit has reached the end of its service life.
- Significant drop in drilling efficiency. If penetration rate falls noticeably despite normal operating parameters, the bit may be worn or damaged.
- Visible cracks or deformation. Structural damage to the bit body, shank, or carbides requires immediate replacement to avoid catastrophic failure.
Expert Tips to Extend DTH Drill Bit Life
Even the best bits will wear over time, but following these expert practices can maximize performance and service life:
- Avoid Dry Drilling Conditions. Ensure proper air pressure or fluid flushing to prevent overheating and excessive carbide wear.
- Maintain Straight Hole Alignment. Misalignment increases stress on bit components, leading to premature failure.
- Use Proper Lubrication (if applicable). Apply manufacturer-recommended hammer oil to reduce friction and protect moving parts.
- Train Operators on Correct Drilling Practices. Proper training on feed force, rotation speed, and bit handling reduces human error-related failures.
Key Takeaway
Timely replacement and proactive operational practices are essential to maintain drilling efficiency, reduce downtime, and prolong DTH drill bit life. Regular inspections and adherence to best practices ensure consistent performance in every drilling project.
Conclusion
Most DTH drill bit failures are preventable with the right combination of bit selection, proper drilling practices, and regular maintenance. By choosing the correct face design, button shape, and carbide grade for your rock conditions—and by optimizing drilling parameters—you can significantly extend bit life, maintain high penetration rates, and reduce cost per meter drilled.
Partnering with professional, reliable drill bit suppliers ensures access to high-quality tools, technical support, and guidance on bit selection, helping you avoid common failures and achieve consistent, cost-effective drilling results.