Introduction
In demanding drilling environments, even a minor DTH hammer failure can lead to significant consequences—unexpected downtime, reduced penetration rates, increased operational costs, and project delays. For contractors and mining operators, these issues don’t just affect productivity; they directly impact profitability and project timelines.
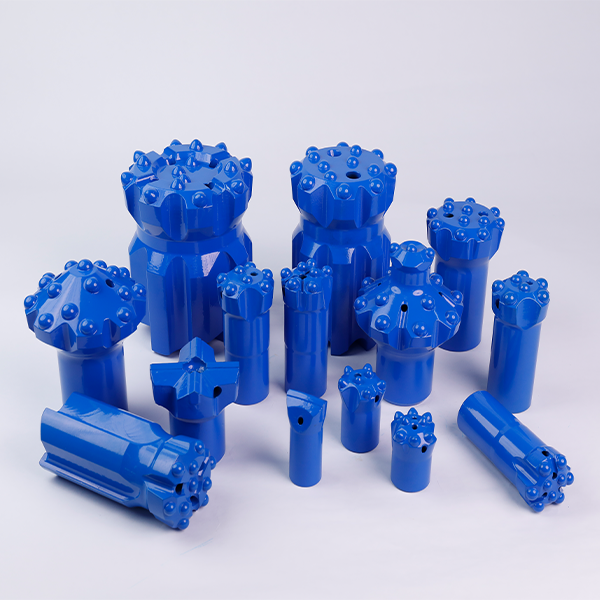
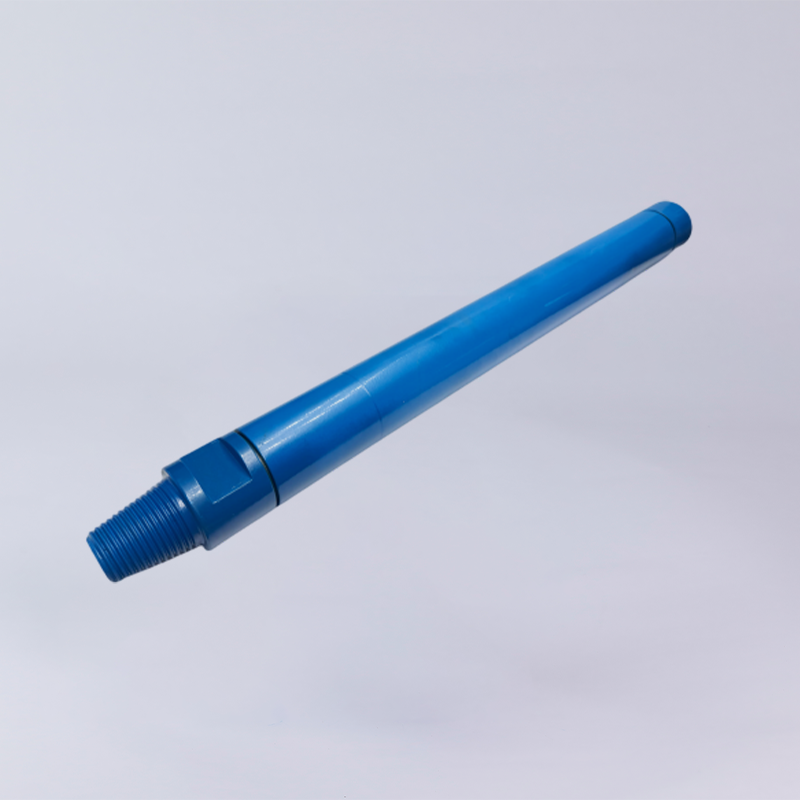
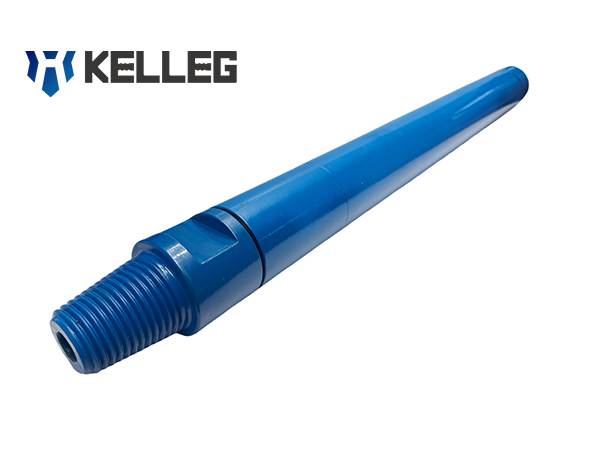
A Down-the-Hole (DTH) hammer is a critical component in rock drilling systems, designed to deliver high-frequency impact energy directly to the drill bit. By combining compressed air with percussive force, it enables efficient drilling in hard-rock conditions such as mining, quarrying, and construction. Its performance plays a decisive role in drilling speed, hole quality, and overall operational efficiency.
However, DTH hammers operate under extreme conditions—high pressure, abrasive rock formations, exposure to dust, and continuous impact loads. Failures often occur due to factors such as inadequate air supply, poor lubrication, improper operation, or lack of regular maintenance. Even small oversights can accelerate wear, reduce efficiency, and lead to costly breakdowns.
In this guide, you’ll learn how to identify common DTH hammer failures, understand their root causes, and apply practical troubleshooting solutions. More importantly, we’ll also cover preventive measures to help you extend hammer life, minimize downtime, and maintain consistent drilling performance.
What Are the Most Common DTH Hammer Failures?
DTH hammer failures typically result from improper operation, insufficient lubrication, incorrect drilling parameters, or component wear. Understanding these common issues—and how to fix them—can significantly reduce downtime and extend tool life.
Below is a complete troubleshooting guide covering the most frequent DTH hammer failures in real drilling conditions.
Broken Driver Sub in DTH Hammer
A broken driver sub is one of the most common and costly DTH hammer failures, often leading to poor energy transfer, unstable drilling, and even tool loss in the hole if not addressed promptly.
Causes
- Loose connection due to improper make-up torque
- Gap between the driver sub shoulder and wear sleeve
- Insufficient feed pressure during drilling
- Lack of proper lubrication on threads
Solutions
- Apply the correct make-up torque according to manufacturer specifications
- Always maintain rotation during hammering to avoid impact damage
- Increase feed force, particularly in soft or unconsolidated formations
- Use the proper type and amount of thread grease to reduce wear
- Replace the driver sub immediately if damage or deformation is detected
Pro Tip: Regularly checking connection tightness and lubrication before drilling can significantly reduce the risk of driver sub failure and extend overall hammer service life.
Excessive Driver Sub Spline Wear
Excessive spline wear on the driver sub can lead to reduced energy transfer, unstable rotation, and accelerated damage to both the hammer and drill bit, ultimately lowering drilling efficiency.
Causes
- Insufficient or inconsistent lubrication
- Excessive movement caused by improper drilling parameters
- Low feed force resulting in poor bit-to-rock contact
Solutions
- Use the correct type of hammer oil and maintain proper lubrication levels at all times
- Optimize drilling parameters to minimize unnecessary movement and vibration
- Increase weight on bit (feed force) to ensure stable and efficient energy transfer
Pro Tip: Consistent lubrication and proper feed force are critical to protecting spline integrity and ensuring smooth power transmission throughout the drilling process.
Cracked Driver Sub
A cracked driver sub is usually caused by improper handling during maintenance or disassembly, and it can quickly lead to complete failure if not identified early.
Causes
- Improper handling, such as striking the component with a sledgehammer
Solutions
- Use proper tools like tongs or chains for safe disassembly
- Avoid any impact-based methods during maintenance to prevent structural damage
Excessive Driver Sub Wear
Excessive wear on the driver sub reduces drilling efficiency and can lead to poor energy transfer and increased component failure risk.
Causes
- Worn drill bit is increasing stress on the hammer
Solutions
- Replace worn drill bits promptly to prevent overload on the driver sub
- Improve cutting removal efficiency to reduce abrasive wear
- Rotate or inspect the driver sub regularly to distribute and monitor wear
Broken Striking Face
A broken striking face directly affects the hammer’s impact performance and can significantly reduce penetration rate.
Causes
- Insufficient feed force during drilling
- Debris entering and accumulating inside the hammer
- Faulty or malfunctioning check valve
Solutions
- Increase feed force to ensure stable and consistent rotation
- Clean internal hammer components regularly to remove debris
- Replace the check valve if it is not functioning properly
Pro Tip: Maintaining clean internal air pathways and correct feed force is essential to protect the striking face and ensure stable impact energy output.
Broken or Cracked Piston
A broken or cracked piston is a serious internal failure that directly reduces impact energy and can cause complete hammer shutdown if not addressed.
Causes
- Corrosion or material fatigue over time
- Insufficient or inconsistent lubrication
- Improper handling or stress during stuck-hole situations
Solutions
- Clean the hammer thoroughly after operation, especially after foam or wet drilling
- Maintain a stable and adequate lubrication system with correct hammer oil
- Use proper extraction and handling procedures to avoid mechanical stress
Cracked Wear Sleeve
A cracked wear sleeve can compromise structural integrity and lead to misalignment or internal damage within the hammer assembly.
Causes
- Incorrect gripping position during maintenance
- Excessive wear or long-term corrosion
Solutions
- Always use correct tong placement when handling the hammer
- Replace the wear sleeve once it reaches its wear limit
- Use neutral pH water during operation and apply anti-corrosion protection during storage
Thread Failure
Thread failure often results in weak connections between hammer components, increasing the risk of separation or severe damage during drilling.
Causes
- Corrosion at thread roots due to poor maintenance or exposure
Solutions
- Apply thread grease regularly to protect against corrosion and galling
- Inspect threads frequently and replace components when wear or damage is detected
Broken Top Sub
A broken top sub can lead to unstable air distribution and compromised hammer performance, often caused by incorrect assembly practices.
Causes
- Incorrect or insufficient torque during assembly
Solutions
- Always apply manufacturer-recommended torque values during installation
- Ensure proper tightening procedures are followed to maintain structural integrity
Pro Tip: Consistent torque control and thread protection are essential for preventing premature connection failures in DTH hammers.
Missing Reaming Buttons
Missing reaming buttons can reduce hole stability and increase the risk of deviation, especially in soft or unconsolidated formations.
Causes
- Excessive wear on the top sub
- Drill bit getting stuck during drilling operations
Solutions
- Adjust drilling parameters according to formation conditions
- Use reaming buttons when drilling in loose or unconsolidated rock formations
Low Penetration Rate (Slow Drilling Speed)
Low penetration rate is one of the most common performance issues in DTH drilling and is often linked to a combination of air supply, wear, and parameter imbalance.
Causes
- Low operating air pressure
- Worn drill bit or driver sub
- Insufficient feed force or rotation speed
- Internal contamination or worn hammer components
- Excessive water injection reduces impact efficiency
- Incorrect or missing choke size
Solutions
- Check compressor performance and inspect for air leaks
- Replace or regrind the drill bit if necessary
- Increase feed force and optimize rotation speed (RPM)
- Open hammer and clean internal components thoroughly
- Inspect piston, wear sleeve, and other parts against discard limits
- Reduce water injection to maintain proper air energy transfer
- Install the correct choke size for stable airflow
Pro Tip: Stable air pressure and correct balance between feed force and rotation speed are the key factors controlling penetration efficiency in DTH drilling.
Erratic Operation or Unstable Rotation
Erratic hammer behavior or unstable rotation can significantly reduce drilling accuracy and increase wear on all components.
Causes
- Excessive feed force applied during drilling
- Rotation speed too low for formation conditions
- Worn blow tube inside the hammer
- Worn driver sub reducing stability
- Excessive water injection
- Worn or damaged drill bit
Solutions
- Reduce feed pressure until smooth and stable drilling is achieved
- Adjust RPM to match rock formation conditions
- Inspect and replace blow tube if worn or damaged
- Check driver sub length and replace if excessive wear is found
- Reduce water injection to avoid energy loss
- Sharpen or replace drill bit as needed
Pro Tip: Proper balance between feed force and rotation speed is essential to maintain stable hammer operation and reduce vibration-related wear.
Hammer Not Operating in the Hole
When a DTH hammer stops operating in the hole, it usually indicates a serious internal or airflow-related issue that requires immediate inspection to avoid further damage.
Causes
- Broken or severely worn internal components
- Blocked air passages or clogged flushing holes
- Insufficient compressed air supply from the compressor
- Piston stuck or damaged due to wear or contamination
Solutions
- Disassemble the hammer and perform a full internal inspection
- Clean all air passages and flushing holes thoroughly
- Verify compressor output and ensure a stable air supply
- Replace any damaged or worn internal components immediately
Hole Deviation at Startup
Hole deviation during collaring can lead to poor drilling accuracy and increased risk of borehole instability.
Causes
- Excessive feed force during the initial drilling (collaring stage)
- Worn or damaged drill bit affecting alignment
Solutions
- Reduce feed pressure during hole starting to ensure stable collaring
- Replace worn drill bits promptly
- Ensure correct alignment before drilling begins
Poor Cuttings Removal (Debris Not Exiting Hole)
Inefficient cutting removal reduces drilling efficiency and can cause hole blockage or hammer damage.
Causes
- Low air pressure or insufficient flushing energy
- Slow cutting velocity in the borehole
- Air loss in fractured or highly permeable formations
- Oversized or accumulated debris in the hole
Solutions
- Increase air pressure to improve flushing capacity
- Use drill pipes with a larger outer diameter (OD) if needed
- Reduce drilling speed in fractured formations
- Lift and flush the hammer regularly during drilling
- Adjust rotation speed to improve cuttings transport
Pro Tip: Effective hole cleaning depends on maintaining enough air velocity to continuously carry cuttings out of the borehole.
Vibration or Squealing Noise from the Hole
Unusual vibration or squealing noise is often a sign of improper drilling balance or excessive wear on key components.
Causes
- Insufficient feed force
- Excessively high rotation speed
- Difficult or highly abrasive rock conditions
- Worn or damaged drill bit
Solutions
- Adjust and balance feed force and rotation speed
- Maintain consistent flushing during drilling
- Replace or sharpen the drill bit when wear is detected
Pro Tip: Stable drilling parameters and a sharp bit are essential to minimize vibration, reduce noise, and extend tool life.
Difficulty Uncoupling Driver Sub
Difficulty in uncoupling the driver sub is often caused by excessive load or poor maintenance practices, which can lead to thread damage or handling risks.
Causes
- Excessive feed force applied during drilling or disassembly
- Lack of proper thread lubrication
- Improper or poor gripping methods during maintenance
Solutions
- Apply grease to all threaded connections regularly
- Use correct torque during assembly and disassembly
- Avoid gripping directly on threads to prevent damage
Pro Tip: Proper lubrication and correct handling tools significantly reduce thread seizure and improve maintenance efficiency.
Bit and Driver Sub Lost in Hole
Loss of the bit and driver sub in the hole is a critical failure that can result in costly fishing operations or even abandonment of the borehole.
Causes
- Hammering without maintaining rotation
- Worn or damaged driver sub
- Insufficient make-up torque during assembly
- Reverse or counterclockwise rotation during operation
Solutions
- Always ensure continuous rotation while hammering
- Replace worn driver sub components promptly
- Apply correct make-up torque during assembly
- Avoid reverse rotation during drilling operations
Pro Tip: Maintaining correct rotation direction and assembly torque is essential to prevent downhole tool loss.
Back Hammering (Bit Running Off Bottom)
Back hammering occurs when the drill bit loses proper contact with the formation, reducing drilling efficiency and increasing wear on internal components.
Causes
- Worn piston affecting impact stability
- Excessive water injection reduces air energy
- Debris accumulation in spline area
- Bit stuck in firing position
Solutions
- Inspect piston dimensions and replace if out of tolerance
- Reduce water injection to maintain air impact efficiency
- Clean internal hammer components and remove debris
- Check and replace worn splines if necessary
Pro Tip: Maintaining proper air-to-water balance is critical to avoid energy loss and unstable hammer performance.
Melting of Internal Components
Melting of internal components is a severe failure typically caused by excessive heat generated under extreme friction conditions.
Causes
- Excessive friction when attempting to free a stuck hammer in the hole
Solutions
- Use a top sub equipped with back reaming (retrac) buttons
- Avoid applying excessive force when attempting to free stuck tools
Pro Tip: Preventing stuck-hole situations is the most effective way to eliminate friction-induced overheating and internal component damage.
After understanding the most common DTH hammer failures and their root causes, the next critical step is to quickly identify which issue is actually occurring in the field. In real drilling operations, downtime is costly, and there is often no time for full disassembly at the early stage of troubleshooting. Therefore, a fast and structured on-site diagnosis process helps operators narrow down potential problems within minutes by evaluating key signals such as air pressure, impact sound, vibration patterns, lubrication condition, and cuttings removal performance. This section provides a practical 5–10 minute field checklist to help you quickly locate the root cause before moving to detailed inspection or repair.
Quick On-Site Diagnosis Checklist (Symptoms → Possible Causes → First Checks)
Before disassembling a DTH hammer, a fast 5–10 minute diagnostic check can help you quickly identify the most likely failure source and avoid unnecessary downtime. Most hammer problems are directly related to air supply, lubrication, flushing efficiency, or internal wear, so a structured field check is essential.
Start with air pressure and leakage inspection, ensuring the compressor is delivering stable and sufficient airflow. Next, listen carefully to the impact sound and vibration pattern—a healthy hammer produces a consistent, strong percussion rhythm, while weak or irregular sound often indicates internal wear or air loss. Then observe lubrication condition and cuttings discharge, as poor oiling or blocked flushing holes will quickly reduce drilling efficiency. If the issue persists, proceed to partial disassembly for internal inspection, focusing on piston movement, valve condition, and wear components.
This quick diagnostic flow allows operators to narrow down the problem within minutes and determine whether the issue is external (air system, parameters) or internal (wear/damage). Below is a practical field checklist to support rapid troubleshooting.
Quick Diagnosis Flow
Air Pressure Check → Leak Inspection → Sound/Vibration Check → Lubrication & Flushing Observation → Internal Inspection
Symptoms Quick Reference Table
| Symptom | Possible Failure Type | Priority Check Items |
|---|---|---|
| Low penetration rate | Air issue/wear | Compressor pressure, bit wear, feed force |
| Weak impact sound | Piston or valve issue | Piston condition, check valve, and lubrication |
| Excessive vibration | Misbalance / worn parts | Bit condition, rotation speed, feed force |
| Poor cutting removal | Flushing problem | Airflow, hole blockage, water injection |
| Hammer not working | Internal blockage | Air passages, piston stuck, broken parts |
| High air consumption | Air leakage | Seals, threads, connections |
This structured approach ensures operators can quickly isolate problems in the field, reduce unnecessary teardown, and improve drilling efficiency before performing full maintenance or repair.
When Should You Repair or Replace a DTH Hammer?
Choosing between repairing and replacing a DTH hammer is a critical decision that directly affects operational cost, drilling efficiency, and long-term productivity. While many components can be repaired or replaced individually, there comes a point where full replacement becomes the more economical option.
Cost Comparison: Repair vs Replacement
- Repair: Suitable for minor wear, such as seals, O-rings, valves, or moderately worn components
- Replacement: Required when major parts (piston, wear sleeve, driver sub) are severely damaged
- In many cases, repeated repairs can exceed the cost of a new hammer over time
Signs Replacement Is More Economical
- Frequent breakdowns despite maintenance
- Severe internal wear affecting multiple core components
- Reduced penetration rate even after repairs
- High air consumption with low drilling performance
- Visible cracks or structural damage in key parts
Lifecycle Considerations
- DTH hammer life depends on rock hardness, drilling parameters, and maintenance quality
- Properly maintained hammers can achieve significantly longer service life
- Once wear reaches discard limits, performance drops rapidly, and replacement is recommended
Pro Tip: If repair frequency increases within a short cycle, it is usually a clear signal that the hammer has reached the end of its efficient service life.
Expert Tips to Extend DTH Hammer Service Life
Extending the service life of a DTH hammer not only reduces operational costs but also improves drilling consistency and reduces unexpected downtime.
Avoid Dry Running
Operating the hammer without sufficient air and lubrication can cause rapid internal wear and overheating. Always ensure proper airflow and lubrication before drilling.
Use OEM-Quality Spare Parts
Low-quality components may reduce initial cost but often lead to faster wear, poor compatibility, and premature failure of the hammer.
Optimize Drilling Parameters
Correct feed force, rotation speed, and air pressure are essential to maintain stable impact energy and minimize mechanical stress.
Monitor Performance Data
Regularly track penetration rate, air consumption, and vibration patterns to detect early signs of wear or inefficiency.
Pro Tip: Preventive monitoring is far more cost-effective than reactive maintenance—small performance changes often indicate early-stage failure.
Conclusion
Up to 90% of DTH hammer failures can be prevented through proper lubrication, optimized drilling parameters, and regular inspection routines. In most cases, breakdowns are not caused by themselves, but by avoidable operational or maintenance issues.
Accurate diagnosis is the foundation of effective troubleshooting. By quickly identifying symptoms and linking them to root causes, operators can significantly reduce unnecessary disassembly, downtime, and repair costs. Combined with a structured maintenance approach, this ensures more stable and predictable drilling performance.
Ultimately, a well-maintained DTH hammer delivers three key advantages: reduced downtime, extended service life, and lower overall operating costs. Investing time in correct operation and preventive maintenance always pays off in higher efficiency and long-term reliability.