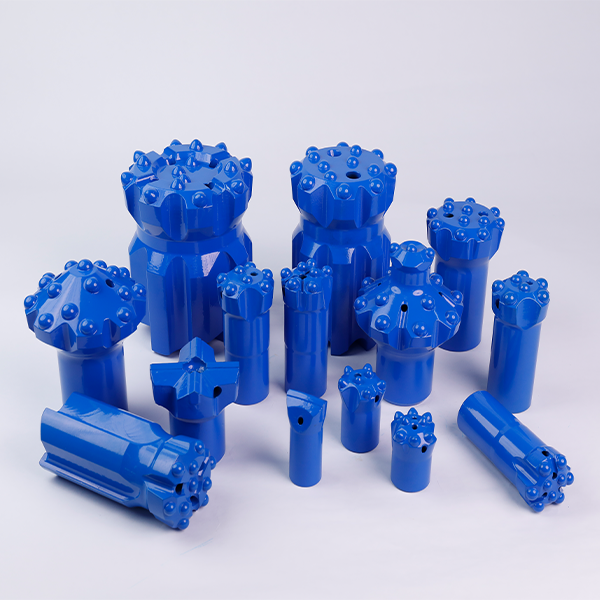
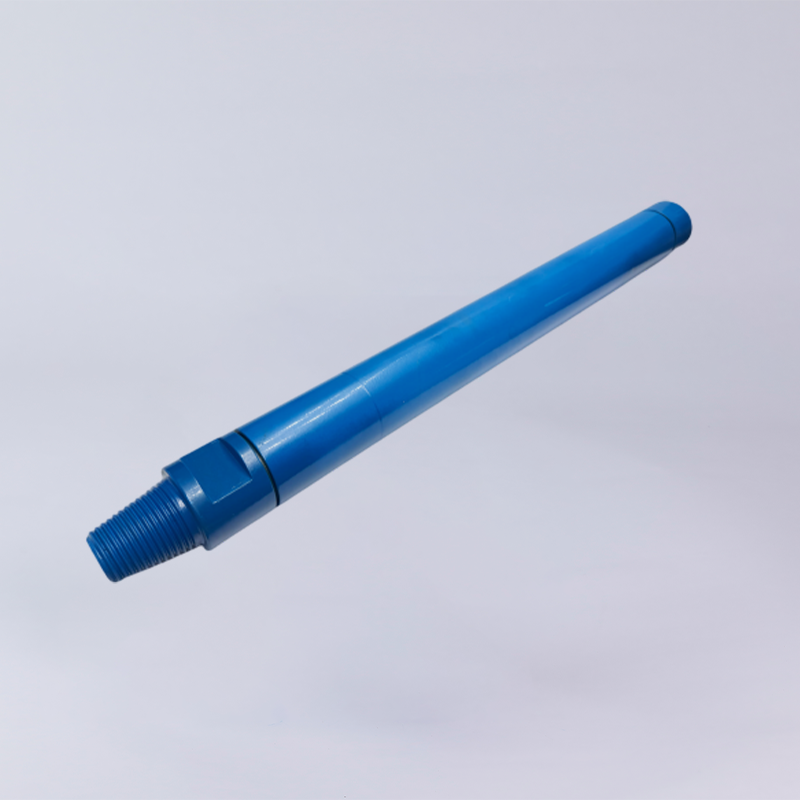
Introduction
In rock drilling operations such as mining, quarrying, tunneling, and infrastructure construction, DTH (Down-the-Hole) drill bits are subjected to extreme impact forces, abrasive rock formations, and continuous high-pressure air flow. These harsh working conditions inevitably lead to wear on the carbide buttons and skirt body. If maintenance is neglected, drilling efficiency can drop quickly, leading to higher operational costs and unexpected downtime.
One of the most common pain points for drilling contractors is the high cost of premature bit failure. Worn or poorly maintained drill bits can significantly reduce penetration rates, increase energy consumption, and cause unstable drilling performance. In severe cases, damaged bits can cause drilling interruptions, equipment strain, and costly delays to project schedules.
Regular maintenance and timely sharpening are therefore essential for maintaining optimal drilling performance. By inspecting and restoring the carbide button profile before excessive wear occurs, operators can greatly improve drilling efficiency and prevent avoidable damage.
Well-maintained DTH drill bits not only last longer but also maintain consistent drilling efficiency in hard rock formations. With proper maintenance practices, drilling teams can extend bit service life by 40–60%, reduce cost per drilled meter, and ensure more stable and predictable drilling operations.
Common Types and Causes of Wear on DTH Drill Bits
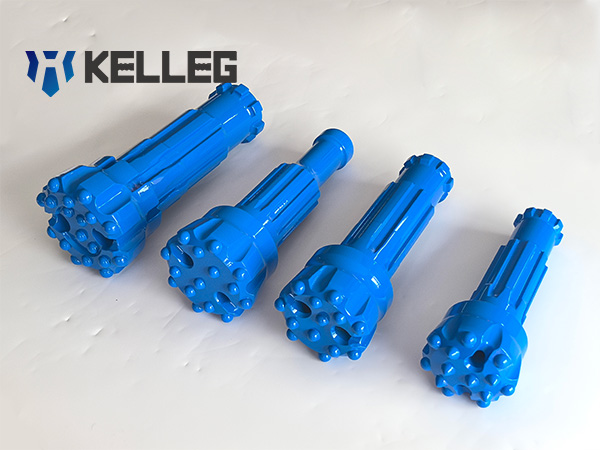
During rock drilling operations, DTH drill bits are constantly exposed to impact loading, abrasive rock particles, and high-pressure air flow. Over time, these conditions lead to different forms of wear and failure on carbide buttons and the bit body.
Understanding the most common wear patterns and their root causes can help drilling operators identify problems early, improve maintenance practices, and significantly extend the service life of DTH drill bits.
Below are the most frequently observed failure types in DTH drilling tools and the typical causes behind them.
Carbide Button Pop-Out
Typical Failure Pattern
- Carbide button completely ejected from the bit socket.
Main Causes
- Excessive bit body wash caused by abrasive drilling conditions
- Excessive grinding of the bit body during maintenance
- Drilling in very soft or extremely abrasive formations
- Drilling in unconsolidated or loose rock layers
- Excessive impact energy is produced by the hammer piston
- Insufficient feed pressure during drilling
- Back hammering or dry firing of the hammer
Operational Insight
Carbide pop-out often indicates instability in drilling parameters or improper maintenance practices.
Carbide Broken Inside Socket or Sheared at Bit Body
Typical Failure Pattern
- Carbide broken inside the socket
- Top of the carbide sheared off at the bit surface
Main Causes
- Overheating of the drill bit due to insufficient flushing
- Drilling with flat or severely worn carbide buttons
- Forceful rotation of the drill string when encountering hard obstacles
Operational Insight
Flat carbides reduce cutting efficiency and increase impact stress, which can lead to carbide breakage.
Cracks in Bit Body Near Carbide Socket
Typical Failure Pattern
- Cracks near the carbide button socket
- Cracks originating from the bottom of the carbide socket
- Carbide intact, but surrounding steel matrix is missing
Main Cause
- Excessive interference fit between the carbide button and the bit body
Operational Insight
Improper interference fit during manufacturing can lead to stress concentration in the bit body.
Cracks on Bit Face
Typical Failure Pattern
- Cracks between flushing holes
- Cracks between carbide buttons
- Cracks between flushing holes and carbide sockets
Main Causes
- Excessive feed force during drilling
- Continued drilling with flat or worn carbide buttons
Operational Insight
High feed pressure combined with worn buttons can increase stress on the bit face, leading to structural cracks.
Carbide Crushed to Body Level
Typical Failure Pattern
- Carbide crushed down to the level of the bit face
- Carbide crushed inside the bit body
Main Causes
- Over-drilling in non-abrasive rock formations such as limestone
- Improper carbide sharpening intervals
- Excessive carbide protrusion caused by poor grinding practices
Operational Insight
Regular grinding helps maintain the correct carbide height and button geometry.
Missing Carbide with Matrix Damage
Typical Failure Pattern
- Carbide is partially missing with a damaged surrounding matrix
- Carbide is completely missing, with significant steel deformation
Main Causes
- Continued drilling with a severely worn bit
- Drilling with flat carbides
- Improper grinding intervals
- Operating a bit already missing carbide buttons
Operational Insight
Once a carbide button is lost, drilling should stop immediately to prevent further damage.
Carbide Chipping and Cracking
Typical Failure Pattern
- Carbide button chipped
- Carbide cracked
Main Causes
- Over-drilling with a worn bit
- Drilling in non-abrasive rock formations
- Incorrect grinding intervals
- Carbide grade is too hard for the rock condition
- Slow rotation causes the bit to strike unstable rock surfaces
Operational Insight
Proper button material selection and drilling parameters are essential for preventing carbide damage.
Face Cracking
Typical Failure Pattern
- Visible cracks across the bit face
Main Cause
- Excessive feed force applied during drilling
Operational Insight
Excessive downforce can overload the bit structure and reduce drilling stability.
Bit Body Wash
Typical Failure Pattern
- Severe steel wear on the bit body and bit face
Main Cause
- Drilling in extremely abrasive rock formations
Operational Insight
Body wash reduces structural strength and can eventually lead to carbide loss or bit failure.
Carbide “Snake Skin” Wear Pattern
Typical Failure Pattern
- Carbide surface develops a cracked or snake-skin-like wear pattern
Main Causes
- Drilling in non-abrasive rock such as limestone
- Improper carbide grinding intervals
Operational Insight
This wear pattern usually appears when carbides experience high impact stress but limited abrasive wear.
Shank Break Across the Retaining Ring Bearing Surface
Typical Failure Pattern
Breakage of the bit shank at the retaining ring bearing surface.
Main Causes
- Insufficient lubrication between moving components
- Worn-out bit retaining rings
- Worn guide bushing inside the DTH hammer
Operational Insight
The retaining ring area experiences high impact and rotational loads. Without proper lubrication and component maintenance, fatigue failure can occur.
Shank Break Across the Drive Splines
Typical Failure Pattern
- Fracture across the spline section of the bit shank.
Main Causes
- Oversized bit head diameter relative to the DTH hammer diameter
- Excessive torque applied during drilling
- Worn driver sub causing poor torque transmission
Operational Insight
Proper bit-to-hammer compatibility is critical to prevent spline overload and structural failure.
Broken Piston Striking Face
Typical Failure Pattern
- The striking face of the piston or the bit impact surface becomes broken or damaged.
Main Causes
- Worn piston
- Worn bit retaining rings or driver sub
- Worn guide bushing is causing poor alignment
Operational Insight
Misalignment inside the hammer can lead to uneven impact distribution, increasing the risk of piston and bit damage.
Shoulder Damage
Typical Failure Pattern
- Visible wear or deformation on the shoulder area of the drill bit.
Main Cause
- Incorrect feed force applied during drilling
Operational Insight
Improper feed pressure can create excessive mechanical stress on the bit shoulder, leading to premature wear.
Piston Striking Face Damage
Typical Failure Pattern
- Damage or deformation on the bit surface where the piston strikes.
Main Causes
- Insufficient lubrication within the hammer system
- Foreign materials trapped between the piston and the drill bit
Operational Insight
Contaminants inside the hammer can significantly increase impact stress and mechanical wear.
Bit Retaining Area Damage
Typical Failure Pattern
- Structural damage around the bit retaining area.
Main Causes
- Drilling with a loose driver sub
- Insufficient feed force causes the bit to outrun the hammer
Operational Insight
Proper feed force ensures stable contact between the piston and the drill bit, preventing abnormal wear.
Broken Blow Tube or Foot Valve
Typical Failure Pattern
- Failure or breakage of the blow tube or foot valve inside the hammer system.
Main Causes
- Worn piston, drive splines, or driver sub
- Misalignment of internal hammer components
- Insufficient lubrication
Operational Insight
The blow tube and foot valve are critical for air flow and hammer operation, and their failure can severely affect drilling performance.
Signs Your DTH Drill Bit Needs Maintenance or Sharpening
During drilling operations, the performance of a DTH drill bit gradually declines as the carbide buttons and bit body wear. Identifying the early warning signs of wear allows operators to perform maintenance or sharpening at the right time, preventing severe damage and maintaining optimal drilling efficiency.
Below are the most common indicators that a DTH drill bit requires inspection, maintenance, or sharpening.
Key Indicators of Drill Bit Wear
1. Reduced Penetration Rate
A noticeable drop in drilling speed is often the first sign of button wear. As carbide buttons lose their original shape, their ability to effectively fracture rock decreases, resulting in slower drilling progress.
2. Increased Air Consumption
When a bit becomes worn, the drilling system may require more compressed air to maintain performance. This can indicate inefficient rock breaking and reduced energy transfer from the hammer to the bit.
3. Excessive Vibration During Drilling
Uneven or worn carbide buttons can cause unstable drilling conditions, leading to increased vibration in the drill string and hammer.
4. Flat or Worn Carbide Buttons
Carbide buttons naturally develop flat surfaces after extended drilling. If these flats become too large, the bit will lose cutting efficiency and generate excessive heat.
5. Cracked or Missing Carbide Buttons
Visible cracks, chips, or missing buttons are clear indicators that the bit is nearing the end of its service interval and requires immediate maintenance or replacement.
6. Reduced Hole Diameter
When gauge buttons wear down, the drill bit may no longer maintain the correct hole diameter, resulting in undersized boreholes and potential drilling deviation.
Tip for Field Operators
Button carbides should be sharpened when the flat wear area reaches approximately one-quarter (1/4) of the carbide button’s major diameter.
Timely sharpening helps restore the original button profile, improving rock penetration efficiency and significantly extending the service life of the drill bit.
DTH Drill Bit Maintenance Checklist: Daily and Weekly Inspection Guide
Regular maintenance is essential for keeping DTH drill bits operating at peak efficiency. A structured inspection routine helps drilling teams detect early wear, prevent unexpected failures, and extend the service life of drilling tools.
The following daily and weekly maintenance checklist can help operators maintain optimal drilling performance while reducing downtime and equipment costs.
Daily Inspection Checklist for DTH Drill Bits
A daily inspection before and after drilling operations helps identify early signs of wear or damage that could reduce drilling efficiency.
| Inspection Item | What to Check | Purpose |
| Visual condition of the bit | Look for dull buttons, chips, cracks, or missing carbides | Detect early wear or structural damage |
| Carbide button wear | Check for flat surfaces on carbide buttons | Identify when sharpening is required |
| Bit diameter (gauge wear) | Measure with calipers to ensure diameter remains within tolerance | Prevent undersized holes and drilling deviation |
| Flushing holes | Ensure flushing holes are not blocked by debris | Maintain effective cuttings removal and cooling |
| Drill bit cleanliness | Remove rock dust, dirt, and drilling debris | Prevent abrasive wear and maintain efficiency |
| Surface contamination | Clean oil, grease, or drilling fluids if present | Prevent corrosion and material degradation |
Operational Insight:
A simple daily inspection can identify small problems early, preventing major bit failures and costly downtime.
Cleaning Procedures After Each Drilling Operation
Proper cleaning after drilling is essential to maintain cutting efficiency and structural integrity of DTH drill bits.
| Cleaning Step | Recommended Action | Benefit |
| Remove drilling debris | Clean off rock dust, sand, and cuttings | Prevent abrasive wear |
| Remove oil or drilling fluids | Use solvent cleaners when necessary | Reduce corrosion risk |
| Dry the drill bit | Ensure the bit is completely dry before storage | Prevent rust formation |
| Inspect during cleaning | Check for visible damage or abnormal wear | Identify maintenance needs early |
Lubrication and Cooling Checks
Proper lubrication and cooling help reduce friction, prevent overheating, and maintain carbide strength during drilling operations.
| Inspection Item | What to Check | Benefit |
| Lubrication level | Ensure adequate lubrication in hammer components | Reduce mechanical wear |
| Cooling effectiveness | Verify proper air flushing or coolant flow | Prevent overheating |
| Recommended lubricants | Use manufacturer-approved lubrication products | Protect internal hammer components |
Technical Note:
Insufficient lubrication can lead to overheating, accelerated carbide wear, and internal hammer damage.
Weekly Maintenance Checklist
In addition to daily inspections, a more detailed weekly inspection helps maintain long-term drilling performance.
| Maintenance Task | What to Check | Maintenance Goal |
| Carbide sharpening inspection | Check if button flats reach sharpening threshold | Maintain penetration efficiency |
| Structural inspection | Examine bit body, shoulder, and shank for cracks or deformation | Prevent structural failure |
| Retaining components | Inspect retaining rings, driver sub, and guide bushings | Ensure proper hammer-bit connection |
| Flushing system | Verify flushing holes and air channels remain unobstructed | Maintain effective cutting removal |
Proper Storage Practices for DTH Drill Bits
Correct storage conditions are essential to prevent corrosion, accidental damage, and premature wear.
| Storage Practice | Recommendation | Benefit |
| Store in a dry environment | Avoid moisture exposure | Prevent rust and corrosion |
| Organized storage | Use designated storage racks or boxes | Avoid impacts between bits |
| Separate worn and new bits | Label or categorize by condition | Improve maintenance management |
When to Replace a DTH Drill Bit
Even with proper maintenance, drill bits eventually reach the end of their service life.
| Replacement Indicator | Description |
| Severe carbide wear | Buttons worn beyond sharpening limits |
| Cracked or broken bit body | Structural damage affecting safety |
| Missing carbide buttons | Significant reduction in drilling performance |
| Excessive gauge wear | Bit cannot maintain a proper hole diameter |
Continuing to use severely worn bits can result in poor drilling efficiency, equipment damage, and increased operational risks.
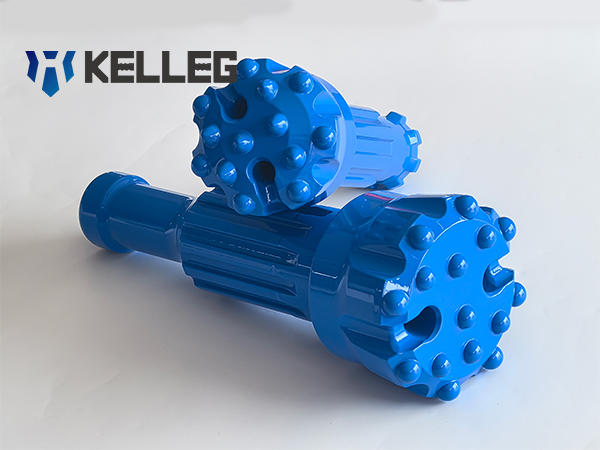
How to Sharpen DTH Drill Bits: Step-by-Step Button Bit Grinding Guide
Regular sharpening is one of the most effective ways to restore drilling efficiency and extend the service life of DTH drill bits. As carbide buttons wear and develop flat surfaces, their ability to fracture rock decreases, which results in slower penetration rates and higher energy consumption.
A proper sharpening process helps restore the original button profile, improve rock fragmentation, and reduce stress on both the drill bit and the DTH hammer.
Below is a practical step-by-step guide for sharpening DTH drill bits, commonly used by drilling operators and maintenance teams.
Step 1: Clean the Drill Bit
Before sharpening, the drill bit must be thoroughly cleaned to allow for accurate inspection and grinding.
Key actions
Remove rock dust, sand, and drilling debris from the bit surface
Clean around carbide buttons and bit face
Inspect flushing holes and remove any blockages
Why it matters
A clean bit ensures that wear patterns are clearly visible and prevents debris from interfering with the grinding process.
Step 2: Inspect the Carbide Buttons
After cleaning, carefully inspect the carbide buttons to determine whether sharpening is required.
Check for the following conditions:
- Flat wear surfaces on the carbide buttons
- Cracks or chips in the carbide
- Missing carbide buttons
- Uneven wear patterns across the bit face
Operational insight
If carbide flats reach approximately one-quarter of the button diameter, sharpening should be performed to maintain drilling efficiency.
Step 3: Use the Correct Grinding Equipment
Using proper grinding equipment ensures consistent sharpening quality and prevents damage to the carbide buttons.
Common grinding tools include:
| Grinding Tool | Typical Application |
| Button bit grinding machine | High-precision sharpening in workshops or maintenance facilities |
| Hand-held pneumatic grinder | Portable grinding for field operations |
| Diamond grinding cups | Grinding hard tungsten carbide buttons |
Selecting the right equipment helps maintain accurate grinding angles and carbide integrity.
Step 4: Restore the Original Button Shape
During sharpening, it is important to restore the original geometry of the carbide buttons, as different button shapes are designed for specific rock conditions.
Common carbide button profiles
| Button Type | Typical Application |
| Spherical buttons | Hard and abrasive rock formations |
| Ballistic buttons | Medium to soft rock conditions |
| Parabolic buttons | Balanced performance across varied rock types |
Maintaining the correct button profile ensures optimal rock penetration and energy transfer during drilling.
Step 5: Maintain Uniform Button Height
All carbide buttons should have consistent height and shape after grinding.
Best practices
- Grind each button evenly
- Avoid excessive grinding of individual buttons
- Ensure the gauge buttons maintain correct height
Why it matters
Uneven button height can cause uneven load distribution, increased vibration, and reduced drilling efficiency.
Step 6: Perform a Final Inspection
After sharpening, perform a final inspection to ensure the drill bit is ready for operation.
Inspection checklist
- Verify that gauge buttons are properly restored
- Ensure flushing holes are clean and unobstructed
- Check that all carbide buttons have consistent profiles
- Confirm there are no cracks or structural damage
Once the inspection is complete, the drill bit can be returned to service with restored cutting performance and improved drilling efficiency.
Best Practices to Extend DTH Drill Bit Life
Maximizing the service life of a DTH drill bit requires more than just regular maintenance. Proper drilling practices, correct operating parameters, and suitable tool selection all play a critical role in reducing wear and improving drilling efficiency.
By following the operational best practices below, drilling teams can extend drill bit life, maintain consistent penetration rates, and reduce overall drilling costs.
Maintain Proper Drilling Parameters
Correct drilling parameters ensure that impact energy from the DTH hammer is efficiently transferred to the rock without causing excessive wear on the drill bit.
| Parameter | Best Practice | Why It Matters |
| Air pressure | Use the recommended air pressure for the hammer model | Ensures efficient energy transfer and stable hammer operation |
| Rotation speed | Maintain proper rotation speed based on rock hardness | Prevents uneven carbide wear and improves rock fragmentation |
| Feed force | Apply optimal feed pressure to keep the bit in steady contact with the rock | Reduces vibration and prevents excessive stress on the bit |
Maintaining balanced drilling parameters helps prevent premature carbide wear and structural damage to the drill bit.
Ensure Adequate Flushing
Efficient flushing is essential for maintaining drilling performance and protecting the drill bit from overheating.
| Flushing Function | Benefit |
| Removes rock cuttings from the borehole | Prevents regrinding of rock fragments |
| Reduces heat buildup on carbide buttons | Protects carbide strength and durability |
| Maintains stable drilling conditions | Improves penetration efficiency |
Insufficient flushing can lead to heat accumulation, faster button wear, and reduced drilling efficiency.
Select the Right Drill Bit for the Rock Type
Choosing the appropriate carbide button design for specific rock conditions can significantly improve drilling performance and extend bit life.
| Rock Type | Recommended Button Type | Key Advantage |
| Hard and abrasive rock | Spherical buttons | High impact resistance and durability |
| Medium-hard rock | Parabolic buttons | Balanced penetration and durability |
| Fractured or softer rock | Ballistic buttons | Faster penetration rate |
Using the correct bit design ensures efficient rock breaking and reduced mechanical stress on the drill bit.
Avoid Excessive Downforce
Applying too much feed pressure during drilling can cause severe mechanical stress on the drill bit.
Potential consequences of excessive downforce include:
- Carbide button breakage
- Bit body deformation or cracking
- Increased vibration and unstable drilling conditions
Maintaining proper feed pressure allows the DTH hammer to deliver consistent impact energy while protecting the structural integrity of the drill bit.
Following these operational best practices, combined with regular inspection and timely sharpening, can help drilling operators extend DTH drill bit life by 40–60% while maintaining optimal drilling efficiency.
Conclusion
Proper DTH drill bit maintenance plays a critical role in ensuring efficient, reliable, and cost-effective rock drilling operations. Because DTH bits operate under extreme impact and abrasive conditions, regular inspection and preventive maintenance are essential to keep drilling performance stable.
By implementing a structured maintenance routine—such as daily inspections, timely carbide sharpening, proper cleaning, and correct storage—drilling teams can significantly reduce unexpected failures and maintain consistent penetration rates.
In many drilling environments, regular inspection and sharpening can extend DTH drill bit service life by 40–60%, while also lowering the overall cost per drilled meter. In addition, maintaining proper drilling parameters—such as correct air pressure, rotation speed, and feed force—helps protect carbide buttons and the bit body from premature wear.
Kelleg’s Professional Maintenance Recommendation
At Kelleg, we recommend combining high-quality drilling tools with proper maintenance practices to achieve the best drilling performance. Our technical team suggests:
- Selecting the right DTH drill bit design for your specific rock formation
- Performing regular button sharpening before excessive wear occurs
- Maintaining proper hammer operating parameters
- Inspecting drill bits routinely to detect early signs of damage
With the right tools and maintenance strategy, drilling contractors can significantly improve tool life, drilling efficiency, and operational reliability.
Need Help Choosing the Right DTH Drill Bits?
If you are looking for high-performance DTH drill bits for mining, quarrying, or construction projects, the Kelleg team is ready to help.
👉 Contact us today to get expert recommendations or request a quotation for your drilling project.